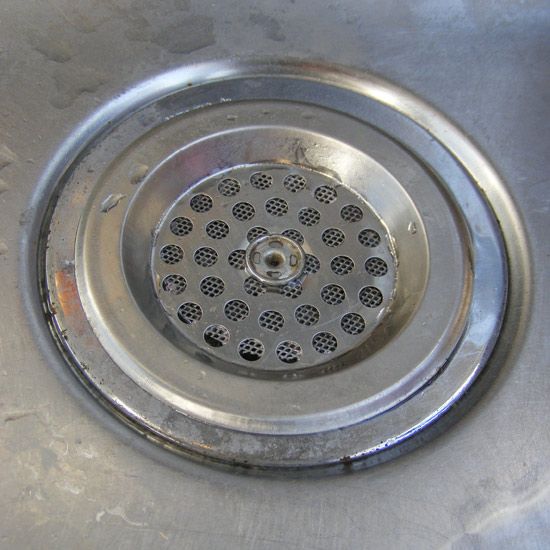
Each wash catches about a pea sized amount - when compressed into a ball between my fingers - of wet fibres. We are running a front loading washing machine with the hose running into the laundry tub rather than straight down into a pipe. If you are doing the same then this set up should work for you.
I recommend checking occasionally to see how the water is draining throughout the first wash to ensure there is no risk of overflow. It is possible to collect the fibres as they clump while there is water in the tub. Scrape your fingernails across the strainer then pinch and you should be able to clear it enough to improve the drainage. Top loader users should exercise greater caution as they do use more water, and this system will slow down the draining of water from the laundry tub.
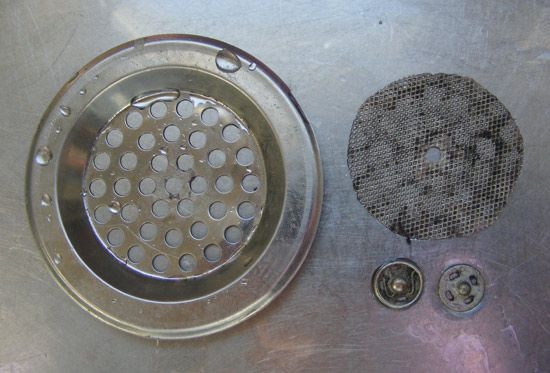
To make this simple, microfibre laundry filter I used an off the shelf sink strainer, an oversized press button and a cut up fry splatter guard* to make a rigid filter.

The press button allows me to detach the filter to clean it out between washes. You can find oversized press buttons at a haberdashery store. A regular sized press button may still work depending on the strainer's holes, but could be fiddly to use.
I got the stainless steel sink strainer and splatter guard from an independent kitchenware store. The fine aluminium mesh of the splatter guard is easily cut with a box cutter style, snap blade, utility knife leaving an edge that is safe to handle. The gauge of the holes is approximately 1mm. I had previously tried cutting up an old stainless steel sieve but it proved difficult to do neatly, without injury and it was tricky to clean out as a result. A scrap of flyscreen mesh while not as fine at about 2mm gauge, should still catch some fibres. When cutting the circle of the filter, it's better to cut it slightly too big in diameter than too small, because you will ensure the strainer holes are completely covered.
Confession: mine is a fraction undersized but I haven't gotten around to cutting a bigger one yet.
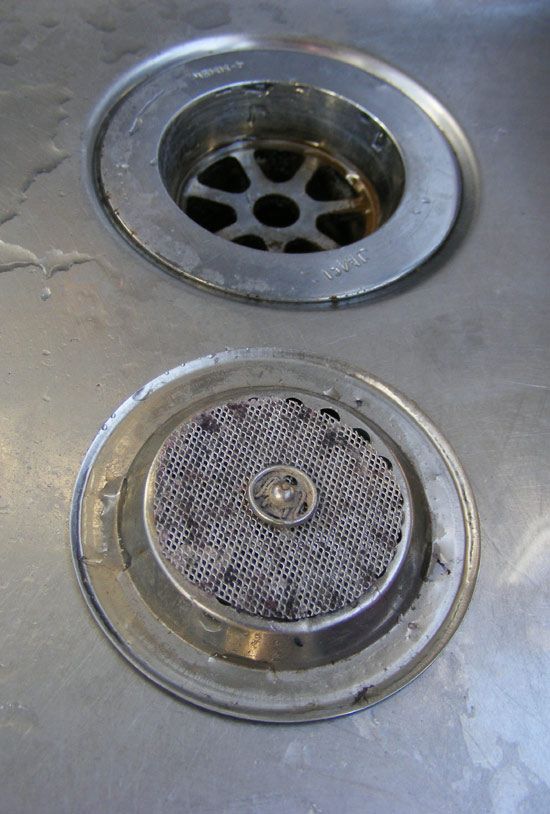
Attach the filter behind/under the strainer. It will filter better and be easier to clean than if you put it on top.

Alternately, you can make the filter and strainer in one - ie sans button and premade manufactured strainer, basically a super fine DIY sink strainer - but I find this doesn't sit as well in the drain hole, and is prone to distortion, requiring adjustment to ensure a good fit for each use.
Clear your filter while wet after each use, by rubbing your finger over the surface.
Always remember to lift the whole assembly out of the drain hole before carefully removing the press button halves.
Avoid removing mid wash if you want to catch the most fibres.
Due to its buoyancy, there are a lot of fibres in the suds which won't drain away the way they usually do. Allow all water and frothy suds to drain and dissipate away before retrieving filter.
On the left, an entire wash's fibres, scale in millimetres.
On the right top down from another singular wash the fibres: in the suds left in the tub post wash; cleaned from the filter only post wash; scraped from the top of the filter during the wash.
*super fine mesh, aluminium screen used when frying food that spatters. The one I used was by Metaltex.
*super fine mesh, aluminium screen used when frying food that spatters. The one I used was by Metaltex.

No comments:
Post a Comment